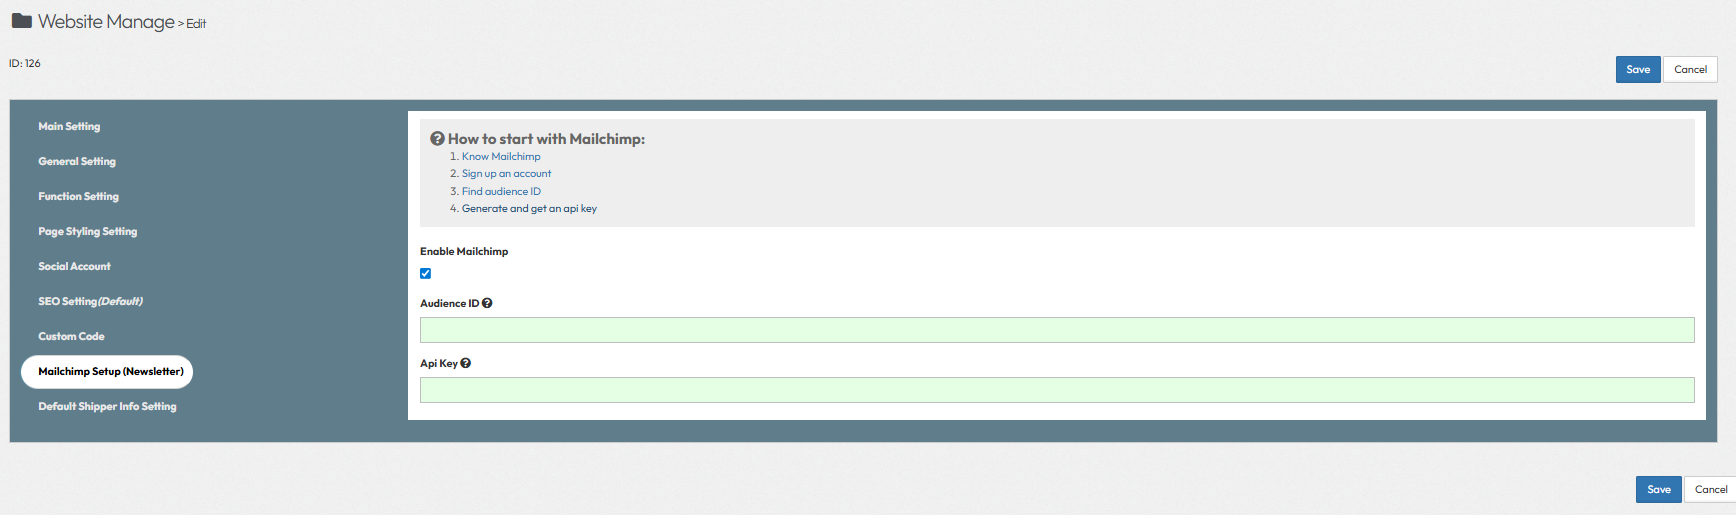
Part 1: Connect Your Account (Plugin Settings)
How to start with Mailchimp:
1. Enable Mailchimp
- Toggle the switch to Enabled to activate the integration.
2. Audience ID
- What is this? A unique identifier for the specific subscriber list you want users to join.
- How to get it: Inside Mailchimp, go to Audience > Settings > Audience name and defaults. You will see a string of numbers and letters under "Audience ID". Copy it.
- Action: Paste that ID into the field above.
3. API Key
- What is this? A secure password that gives this website permission to add subscribers to your Mailchimp list automatically.
- How to get it: Inside Mailchimp, click your profile icon > Account & billing > Extras > API keys. Click "Create A Key", copy it.
- Action: Paste that key into the field above.
Once both are saved, our website and Mailchimp will be connected. New sign-ups on the website will automatically sync to your Mailchimp list.
Part 2: Sending a Newsletter (Inside Mailchimp)
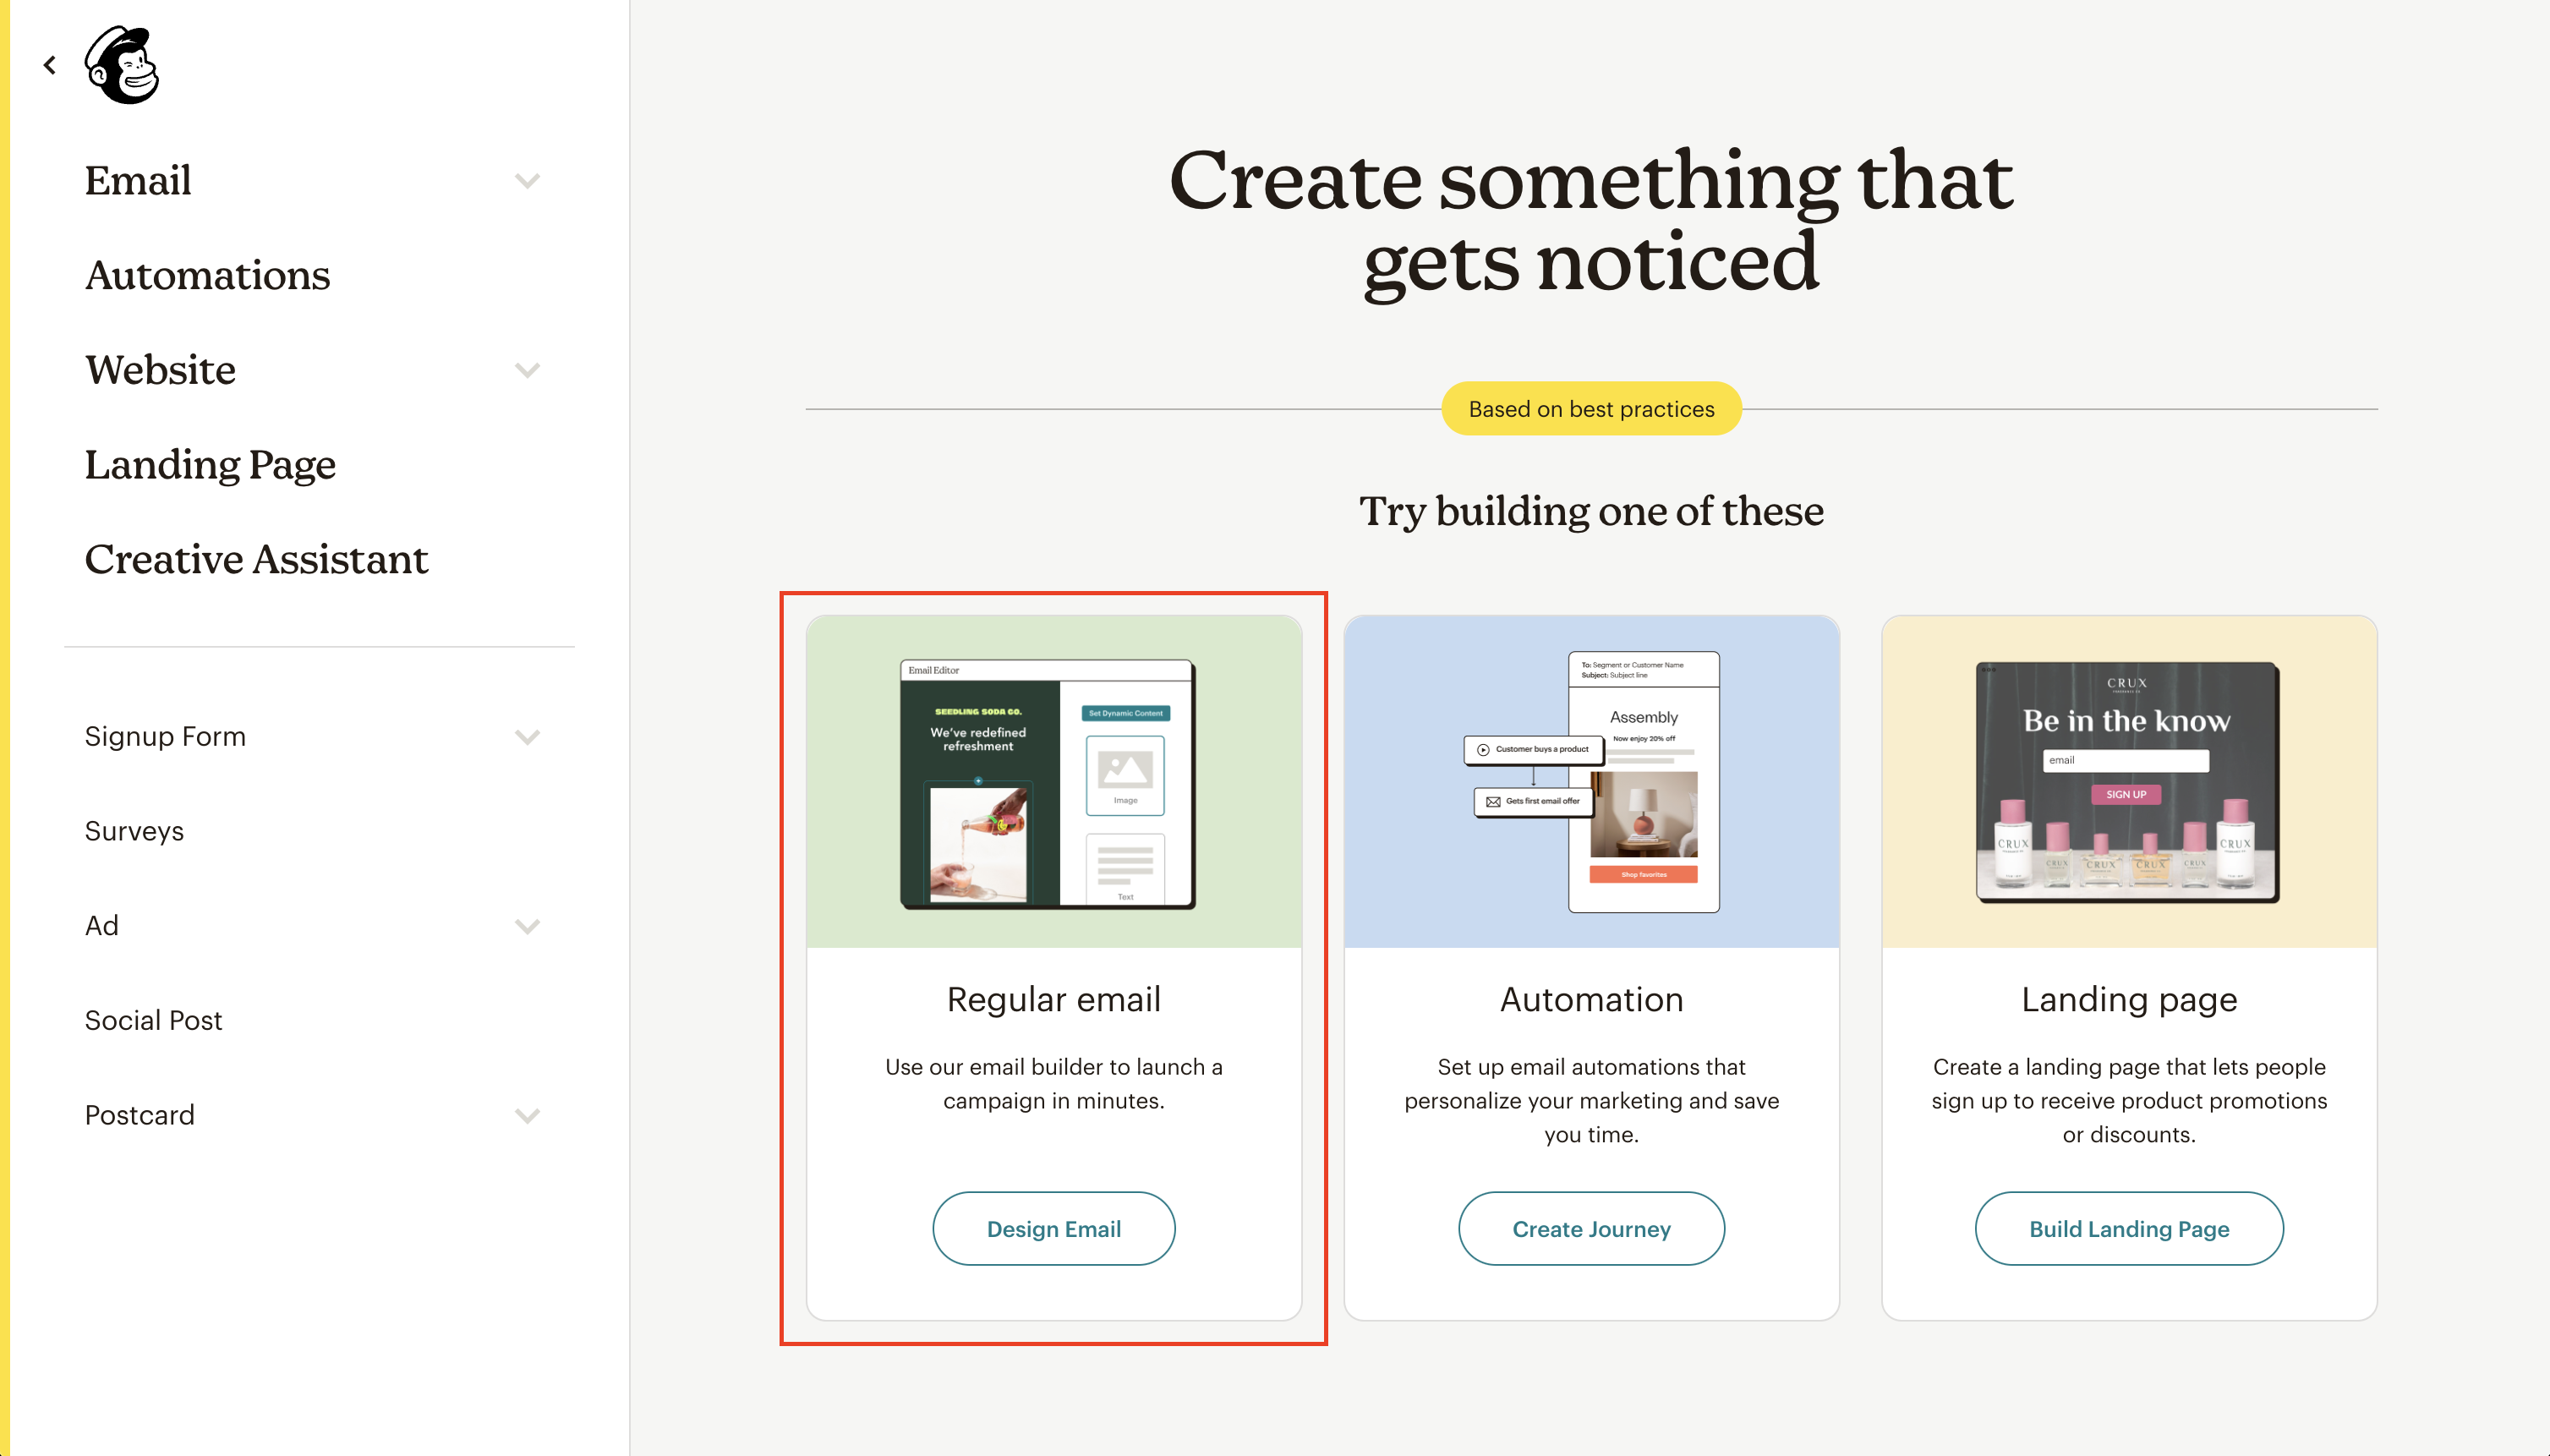
Since you are now inside Mailchimp to send a newsletter, here is the standard process.Now that your website is collecting subscribers, you can send emails. Log into your Mailchimp account and follow this quick workflow:
- Start: Go to Campaigns > Create Campaign > Choose Email (Regular).
- Recipients: In the "To" section, select the Audience you connected in Step 1.
- Details: Enter your "From" name, your email address, and a catchy "Subject" line.
- Design: Select a template (we recommend "1 Column" for beginners) and use their drag-and-drop editor to add text and images.
- Send: Click Preview Mode to test it, then click Send.
Step 3: Need More Help?
Search YouTube for "Mailchimp Email Design Tutorial" for step-by-step video guides.