
Part 1: Google Reviews Overview
The Google Reviews section dynamically pulls and displays real customer reviews directly from your Google Business Profile. Instead of manually typing out testimonials, this section automatically fetches your latest ratings and comments, displaying them beautifully on your website to build immediate trust and social proof with your visitors.
When i can use this?:
- Homepage & Landing Pages: To instantly show new visitors that your business is trusted and active.
- Service/Product Pages: To provide social proof right at the moment a user is making a decision to buy or contact you.
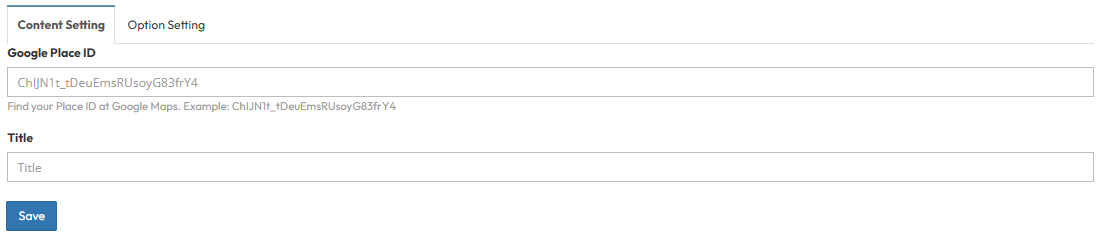
Part 2: How to configure in the Backend?
Setting up this section requires connecting your Google Business data and adjusting the display rules:- Google Place ID: This is the most important setting. You must paste your unique Google Place ID here (e.g., ChIJN1t_tDeuEmsRUsoyG83frY4). You can find this by searching your business name on the Google Place ID finder website.
- Title: Enter a heading for this section (e.g., "What Our Customers Say").
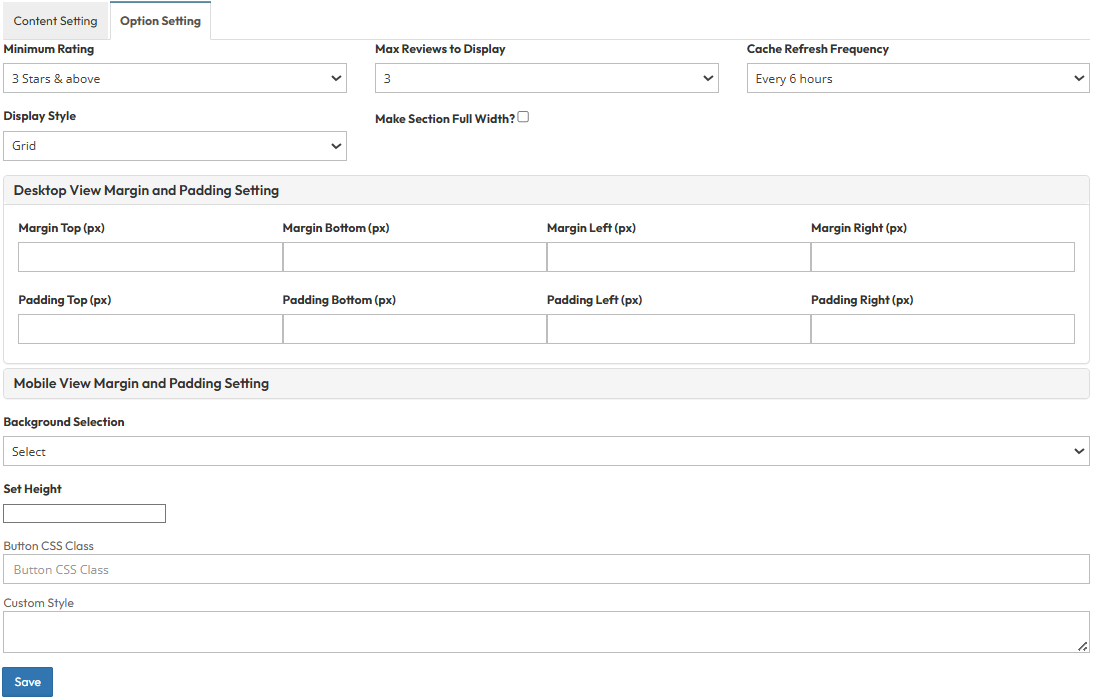
Part 3: Google Review (Option Settings)
- Minimum Rating dropdown:
- To hide bad reviews (e.g., Select "3 Stars & above" to only show 3 Stars and above feedback).
- Max Reviews to Display :
- To control how many show up at once (e.g., max: 20).
- Cache Refresh Frequency:
- Save the reviews and only check Google for new ones every 6 hours, keeping your site loading fast.(e.g., "Every 6 hours").
- Display Style
- Choose how the reviews look (e.g. Grid or None). Grid aligns them side-by-side like cards, while None removes the styling container.
- Make Section full width?
- Stretch content to the screen edges.
- Desktop View Margin and Padding setting
- Adjust external (Margin) and internal (Padding) spacing for Top/Bottom and Left/Right to control layout distances.
- Mobile View Margin and Padding setting
- To display or hide the title area.
- Adjust spacing values specifically for mobile devices to fit smaller screens.
- Head Title & Subhead Title
- Adjust the spacing (Margin) above and below the Main Title and Subtitle text.
- Background Selection
- Default: Uses the standard site background (usually transparent or white).
- Background Color: Fills the section with a solid color of your choice.
- Background Image: Upload an image (Recommended size: 1920x500px).
- Parallax Effect? Toggle Yes to create a 3D scrolling effect where the background moves slower than the content.
- Background Image with Color: Combines an image with a colored overlay.
- Opacity (1-0.1): Controls the overlay strength.
- 1 = Fully opaque (Solid color, image hidden).
- 0.1 = Very transparent (Mostly image).