Part 1: Countdown Form Overview
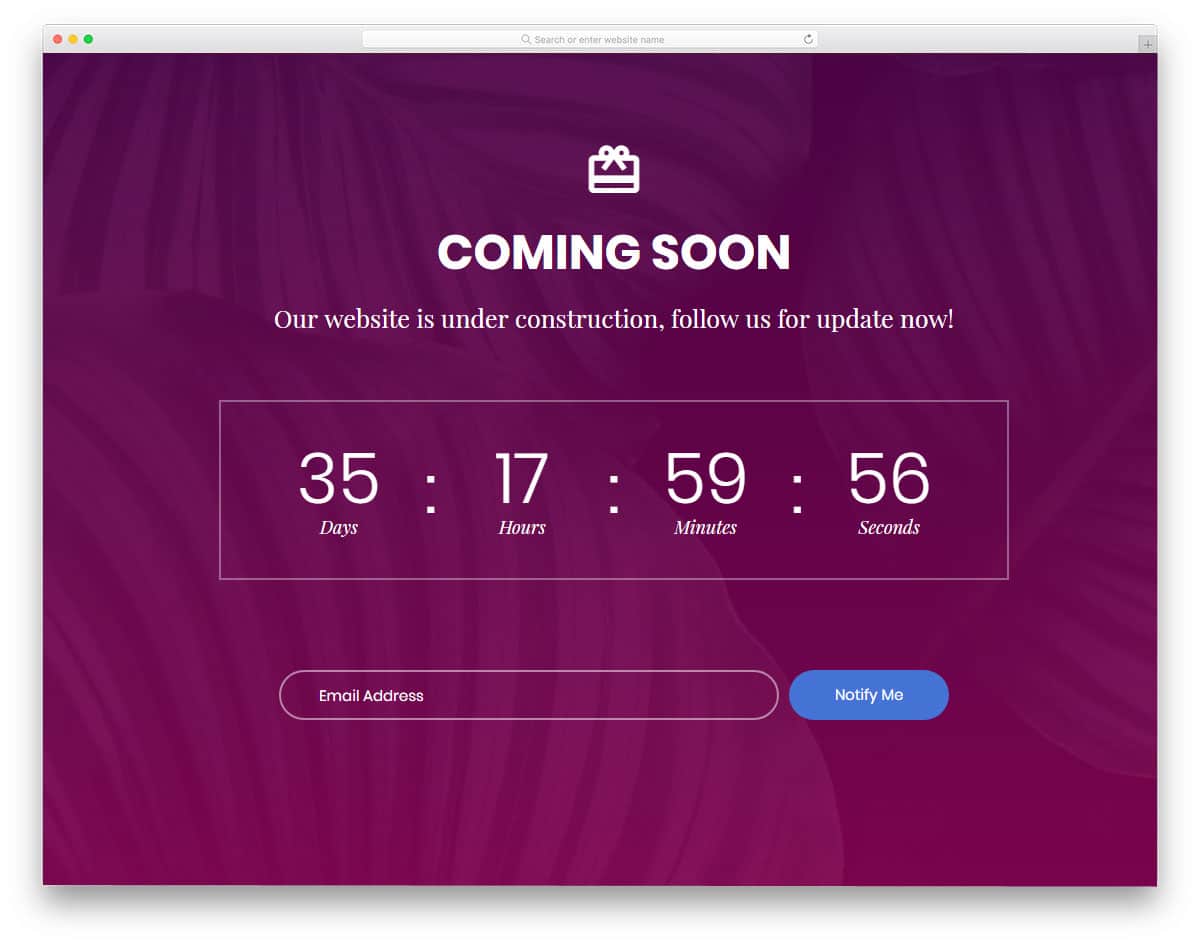
Section Type: Countdown FormThe Countdown Form section combines psychological urgency with direct user engagement. It display a live countdown timer ticking down to a specific deadline, paired with a registration form. This combination encourages users to take immediate action, whether signing up for an event or grabbing a limited-time offer before time runs out.
Key Use Cases :
- Event Registration: Ideal for webinars, conferences, or workshops. Visually reinforces deadlines for early-bird pricing or seat availability.
- Limited-Time Offers: Perfect for flash sales or promotions. The ticking clock creates a sense of scarcity, encouraging users to sign up or purchase quickly to avoid missing out.
Part 2 : How to Configure Your Section
Follow the steps below to configure the layout, timer logic, and form functionality.
Step 1: Countdown Form (Content Setting)
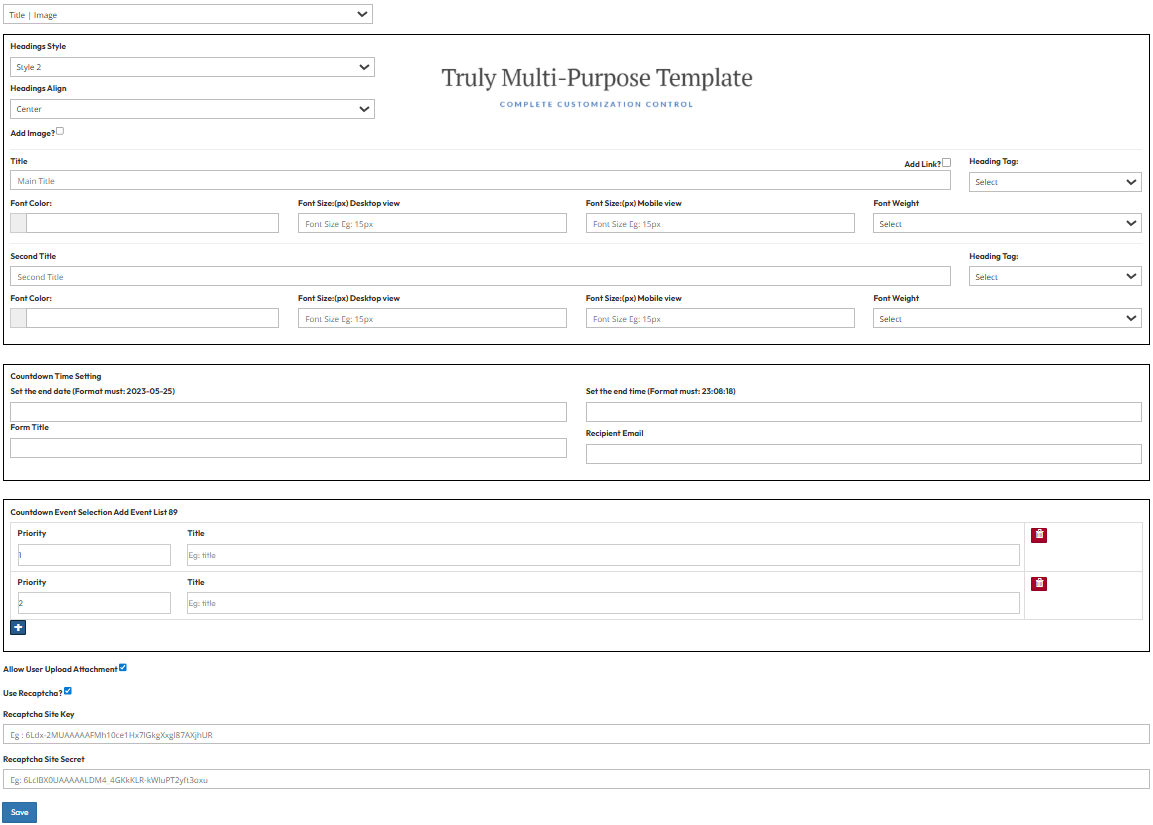
Once you select the section type, configure the layout, timer logic, and form security using the settings below.A. Layout & Typography
- Column Flow Display: Choose the layout arrangement:
- Title | Image
- Image | Title
- Image: Upload a visual asset to accompany the form.
- Typography Settings: Configure the Main Title and Subtitle.
- Settings: Heading Tag (H1-H6), Font Color, Size, and Weight.
- Responsive: Adjust settings specifically for Desktop and Mobile views.
B. Countdown Time & Event Logic
- Countdown Timer: Set the specific End Date and End Time for the countdown.
- Form Settings:
- Form Title: Enter the heading for the registration form.
- Recipient Email: Designate the email address where submissions will be sent.
- Event Selection: Manage the event list associated with the form.
- Fields: Add Event Titles and assign Priority levels.
C. Security & Form Options
- File Uploads: Toggle to allow users to upload attachments with their submission.
- Spam Protection: Enable reCAPTCHA for security.
- Requirement: Input the Site Key and Secret Key provided by your reCAPTCHA account.
Step 2 : Global Option Setting
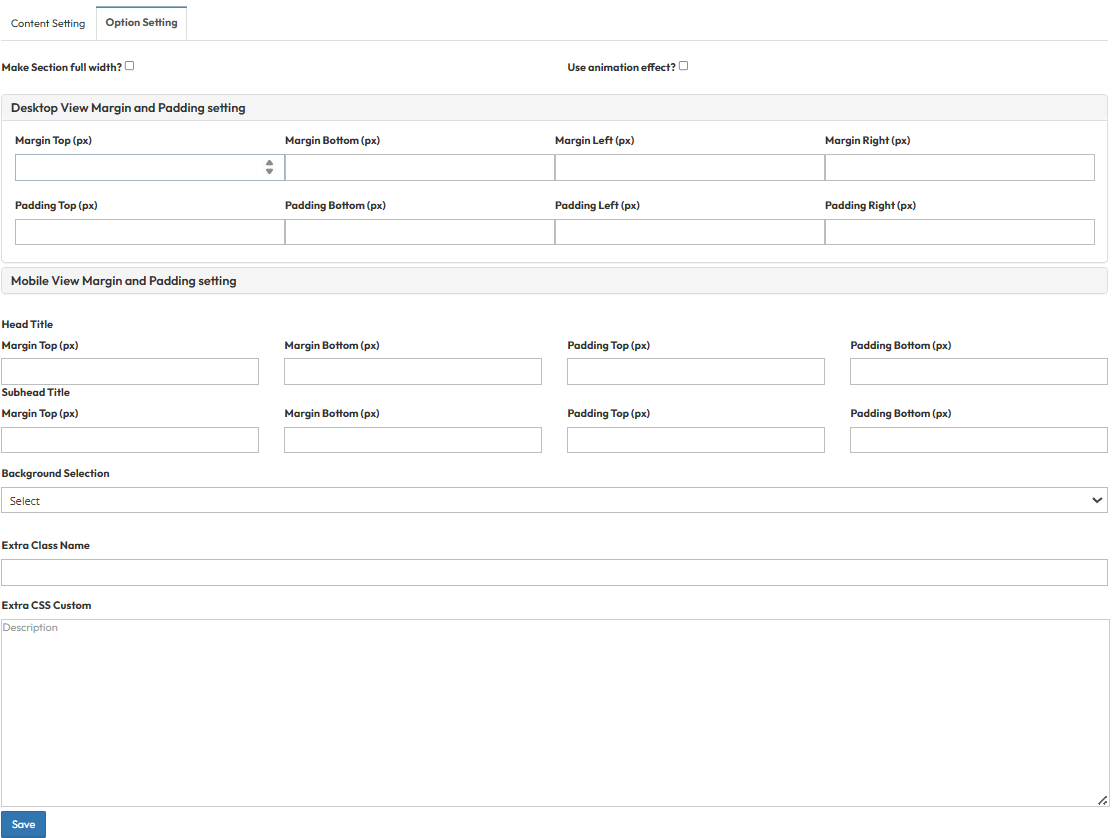
These settings control the layout container and spacing.- Make Section full width?
- Stretch content to the screen edges.
- Use animation effect?
- Enable fade-in or slide-up animations when scrolling to this section.
- Desktop View Margin and Padding setting
- Adjust external (Margin) and internal (Padding) spacing for Top/Bottom and Left/Right.
- Mobile View Margin and Padding setting
- Adjust spacing values specifically for mobile devices to fit smaller screens.
- Head Title & Subhead Title
- Adjust the spacing (Margin) above and below the Main Title and Subtitle text.
- Background Selection
- Default: Uses the standard site background.
- Background Color: Fills the section with a solid color of your choice.
- Background Image: Upload an image (Recommended size: 1920x500px).
- Parallax Effect? Toggle Yes to create a 3D scrolling effect where the background moves slower than the content.
- Background Image with Color: Combines an image with a colored overlay.
- Opacity (1-0.1): Controls the overlay strength (1 = Solid color, 0.1 = Mostly image).